Coherix ShaPix 3D Measurement System is Introduced to MSI-Viking Customers
Ann Arbor, Michigan, July 22, 2014 — MSI Viking customers gained knowledge and experience in understanding waviness and its impact on mating components to seal using the virtual gasket software capability developed by Dr. Malburg on a Coherix ShaPix 1500 system measuring flatness on parts down to plus or minus 1 micron.
Several parts of different sizes and form were brought in by customers to see how their parts were measuring up. The measurement machines these customers had used previously were slower to measure and took longer to obtain results than what they experienced with the speed and accuracy of a ShaPix system.
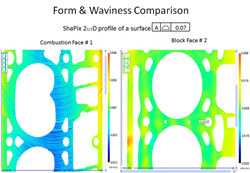
The setup and capturing of full surface measurements for typical parts can be done in about 15 minutes or less. The measurement of a part takes about 40 seconds. The post processing of measurement results involves the use of powerful tools within the ShaPix software to analyze, visualize, and then truly understand the surface and/or the process that created it.
When using the ShaPix 3D High Definition Metrology (HDM) software in process auditing, these operations can be fully automated so that plant floor operators using a ShaPix metrology system can produce reports that are clear, consistent, and easy to comprehend. The reporting or exporting of the information obtained from analyzing a surface is a critical step to communicating result with others. How this information is communicated, transmitted, and consumed impacts the effectiveness of the measurement and the analysis process.
Understanding, managing, and designing the surfaces that create joints in engine manufacturing is extremely important. In order for functionality to be reached, parts must be designed, machined and assembled correctly and then they must effectively interact with their mating parts. Major opportunity, financial and production costs are incurred if production is disrupted or if there is a breach in the quality and functionality of the final product. Controlling the surfaces that create joints is continually challenged by costs, materials, new processes and ever changing sources. Even when the parts meet their specifications, the window for error depends not only on how but also where the measurements are made.
Coherix designs and delivers high-speed, high-definition, 3D metrology and inspection tools for product development and the management of manufacturing processes for the precision manufacturing and semiconductor industries. Headquartered in Ann Arbor, Michigan the company has technical centers in Europe and the Asia Pacific region. Coherix products are being utilized around the world at companies such as Intel, Amkor, BorgWarner, Ford, Honda, Allison Transmission, Chrysler, General Motors, Micron, Infineon, John Deere, Volvo Technology Transfer and Aisin among others.
MSI-Viking Gage is a sales and service organization dedicated to providing advanced metrology solutions to the transportation and advanced manufacturing engineering industries. Their in-house service, repair, modification and calibration capabilities range from full mechanical, electrical, to fabrication parts and assembly. With facilities strategically located in their territory, they can provide comprehensive services within a short distance of their customers.
